As network engineers, many of us have access to very expensive tools. These tools come in different shapes and sizes. Some tools reside on laptops as software, while others may be handheld devices. When traveling with your toolset it can be very challenging. Sometimes you just can't put them in your backpack because of size and weight. This is where the pelican cases come in.
I own over 20+ pelican cases of various models and foam configurations to meet specific project needs. The one headache I had from the very beginning was the pick and pluck foam. A great idea, of course, allowing the customer to pick and pluck the foam to meet their custom needs. The problem is the pick and pluck foam fails apart after just a few uses.
Returning from a short project I was removing my gear and became very frustrated. The foam was falling apart which means I would need to purchase more foam and spend time recutting it. I did look at the option of sending my foam to have molds made but it was expensive. Someone told me about spraying Plasti Dip on the pick-and-pluck foam to give it added strength. I got on the googles and found that some folks were already doing this.
So here is my story of trial and error strengthening the pick-and-pluck foam.
After 10 cases I have refined my process a lot from when I first started.
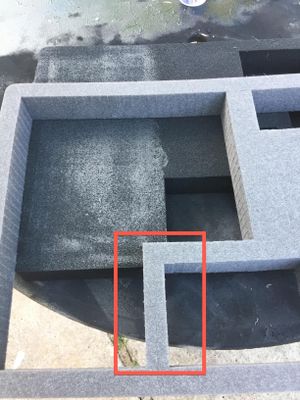
- You will want to pick and pluck your foam to meet your needs. You'll need to make sure you don't make the fit to tight because when you apply PD it's likely to get a bit tighter.
- Make sure when you cut your foam you don't go less than 2 foam pieces thick. I try and do 3 in most cases unless I have to do 2.
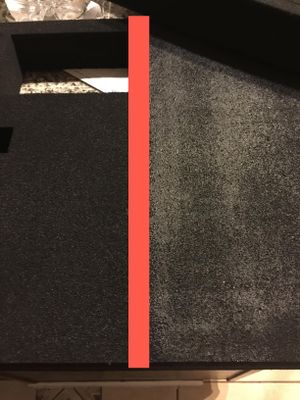
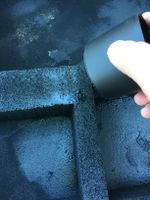
- VERY IMPORTANT! Having done this more than a few times I highly suggest putting a minimum of 4 light coats of PD. Allow the coats to dry between each coat. Of course, you will want to do this outside. The smell is a bit strong. The left side is 4 coats while the right side is where I started to apply a heaver 5th coat.
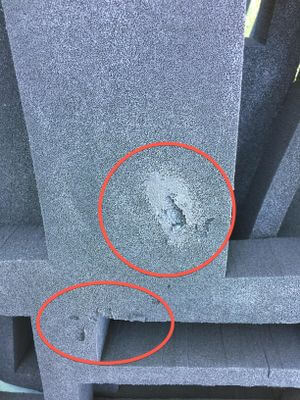
- Don't allow the foam pieces to dry while in contact with each other. Otherwise, this can happen.
- Should for any reason your foam tear or rip apart. Use a hot heat gun to glue the pieces back together.
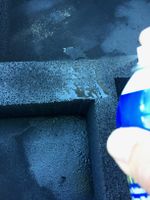
- As you apply each coat you will notice the foam absorbing most of the PD. As I apply heaver coats I allow the PD to puddle and then gently take the cap and pat the foam to help it absorb the PD.
- Don’t forget to apply generous coats to the inside cutouts too.
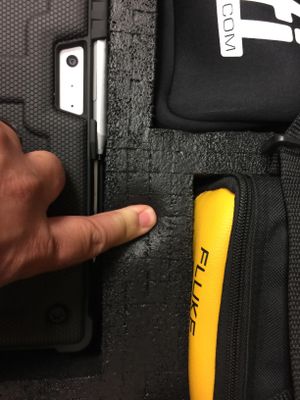
- Depending on how strong you require the foam will depend on how many coats will be applied. Here is one example of my normal travel case. Notice how the rubber keeps the foam together.
A fun little project for the do-it-yourselfer. Enjoy!