One of the things I always enjoy after ATM is sitting down and figuring out how they created some of their technical demos, and more importantly, how I can do this myself.
Note: The following is not necessarily how Aruba chose to solve these problems in their demo. This is meant to be a representative demo, with a simple approach as to how people in the community could approach building similar functionality with easy to consume pieces.
This year's keynote showed Partha Narasimhan running his fictitious company Alpine Orange Superfoods (AOS) with the help of a chatbot to operate the Aruba infrastructure. He showed off everything from onboarding a contractor to ClearPass for guest wireless access.
Now let's break down how we can recreate this, using some easy to consume tools.
ChatBot with Native Language Processing (NLP)
This is a bot that you can interact with in a natural kind of way. It can understand what a user wants to be done, prompt them for information, and then calls other systems to perform actions.
Connectivity to ClearPass API:
We need some way for the bot to talk to ClearPass. Unless your ClearPass server is internet accessible, you probably need some way to deal with how to connect your chatbot to the ClearPass server.
Calling ClearPass to Create a Guest User:
And then we need to call ClearPass to create a guest user.
Sending notifications to the user with their credentials:
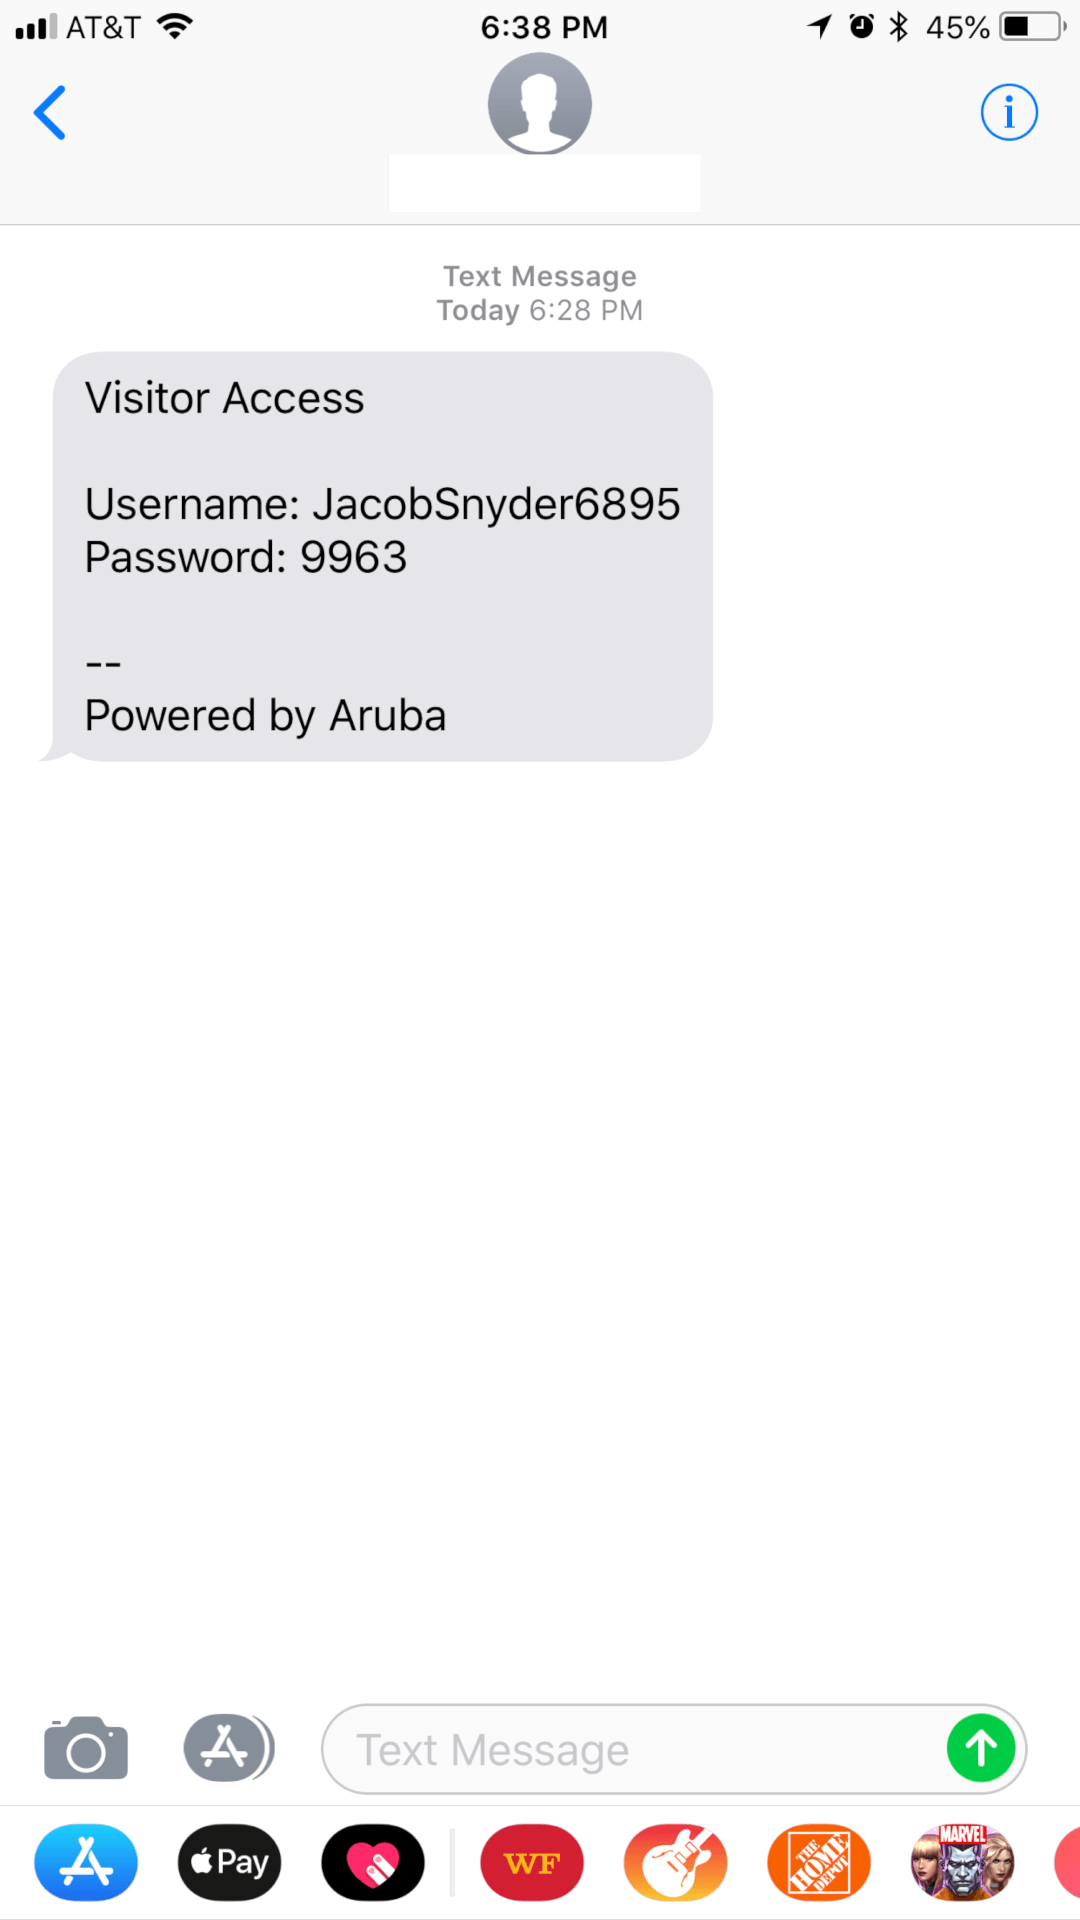
Finally, we need some way to inform the user that their credentials have been created.
Components used to recreate the functionality:
Chat Engine with NLP: DialogFlow.com
NGROK to deal with connectivity to my python box: ngrok.com
Python and Flask to handle the incoming webhook
Python with the Requests library to call the ClearPass API.
ClearPass with Twilio setup for SMS Gateway to send SMS
Step 1: Determine what we need to send to ClearPass
The first step we need to do is determine what info we need to pass ClearPass to create the user. To do this, we are going to hit the API Explorer. You can find this in ClearPass Guest > Administration > API Services > API Explorer. Since we are interested in creating a guest user, click on GuestManager > Guest > POST /guest. This will tell us what we need to get for data. (Or hit https://ClearPassfqdn/api-docs)
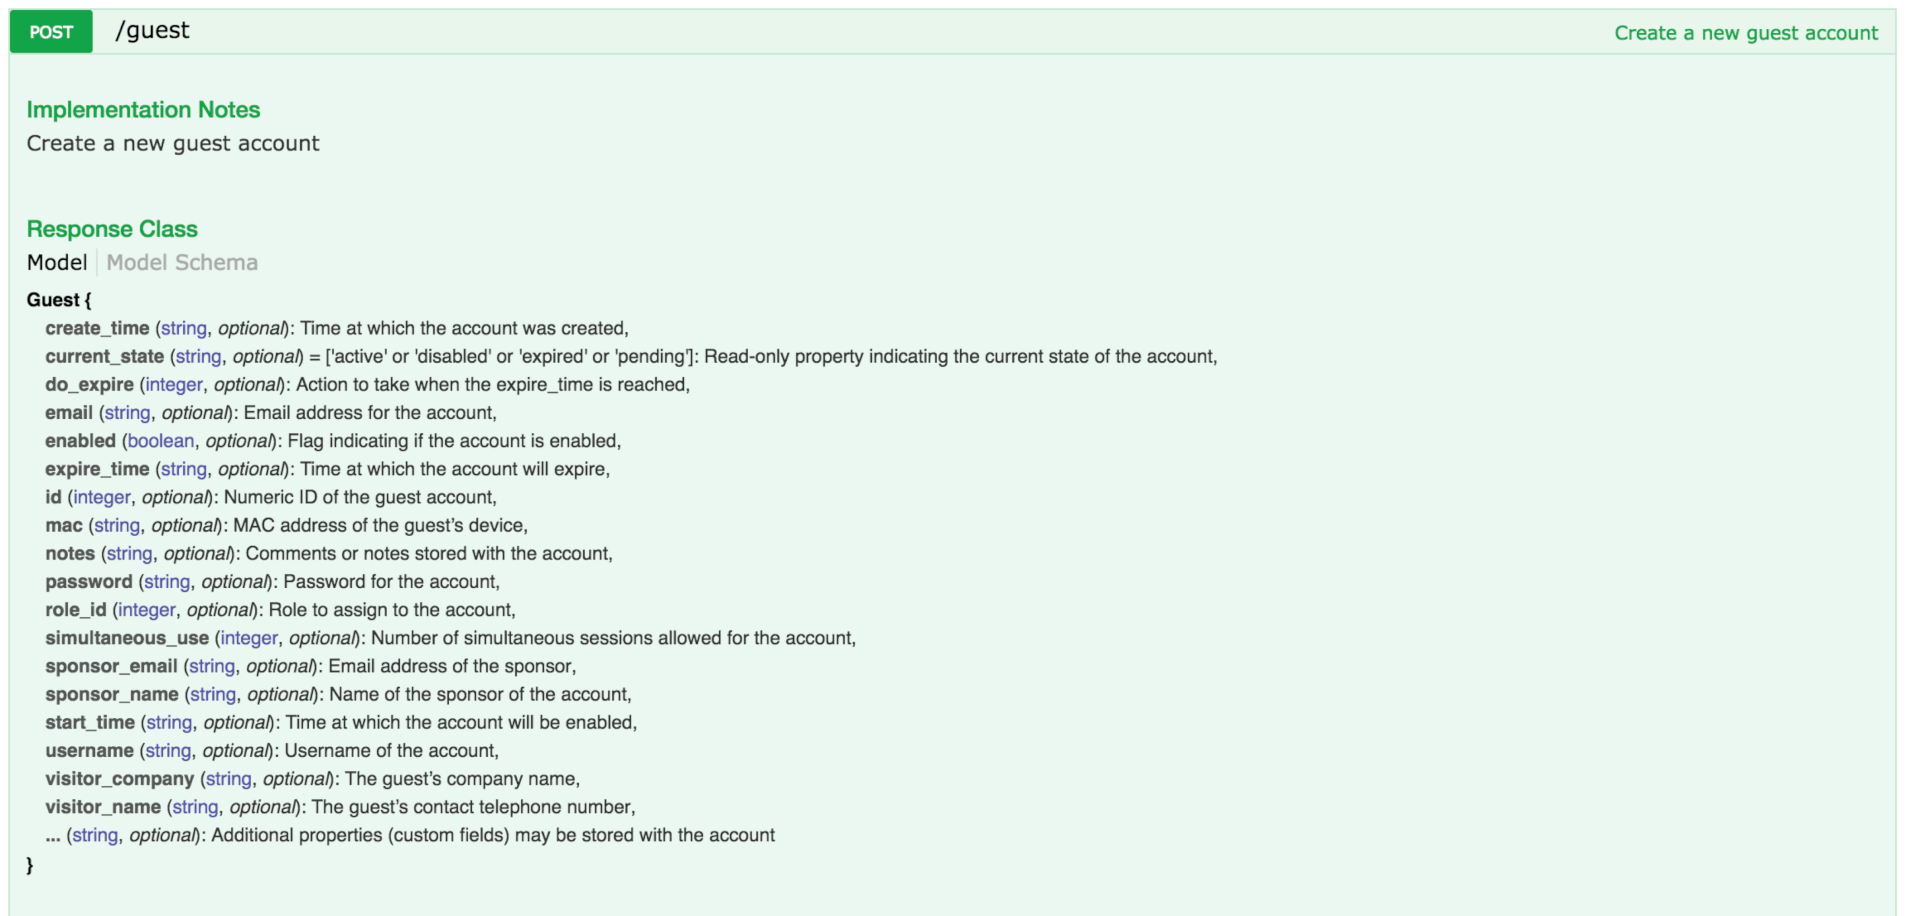
For our purposes, we really need a username, enabled, email, role and visitor_phone, password and the auto_send_sms.
Step 2 - Setting up a chatbot
The Company AOS used Facebook Messenger to interact with ClearPass, but since I rarely use this platform, I'm going to work with Slack instead. Now we just need a platform to talk to the Slack and deal with some of the dialogs for us. For this, I'm going to use DialogFlow (formerly API.ai). This is going to give us the ability to define Intents (things that the user wants to do) and the necessary prompts to get the needed information from the client. It also dramatically reduces the code I'll actually have to write.
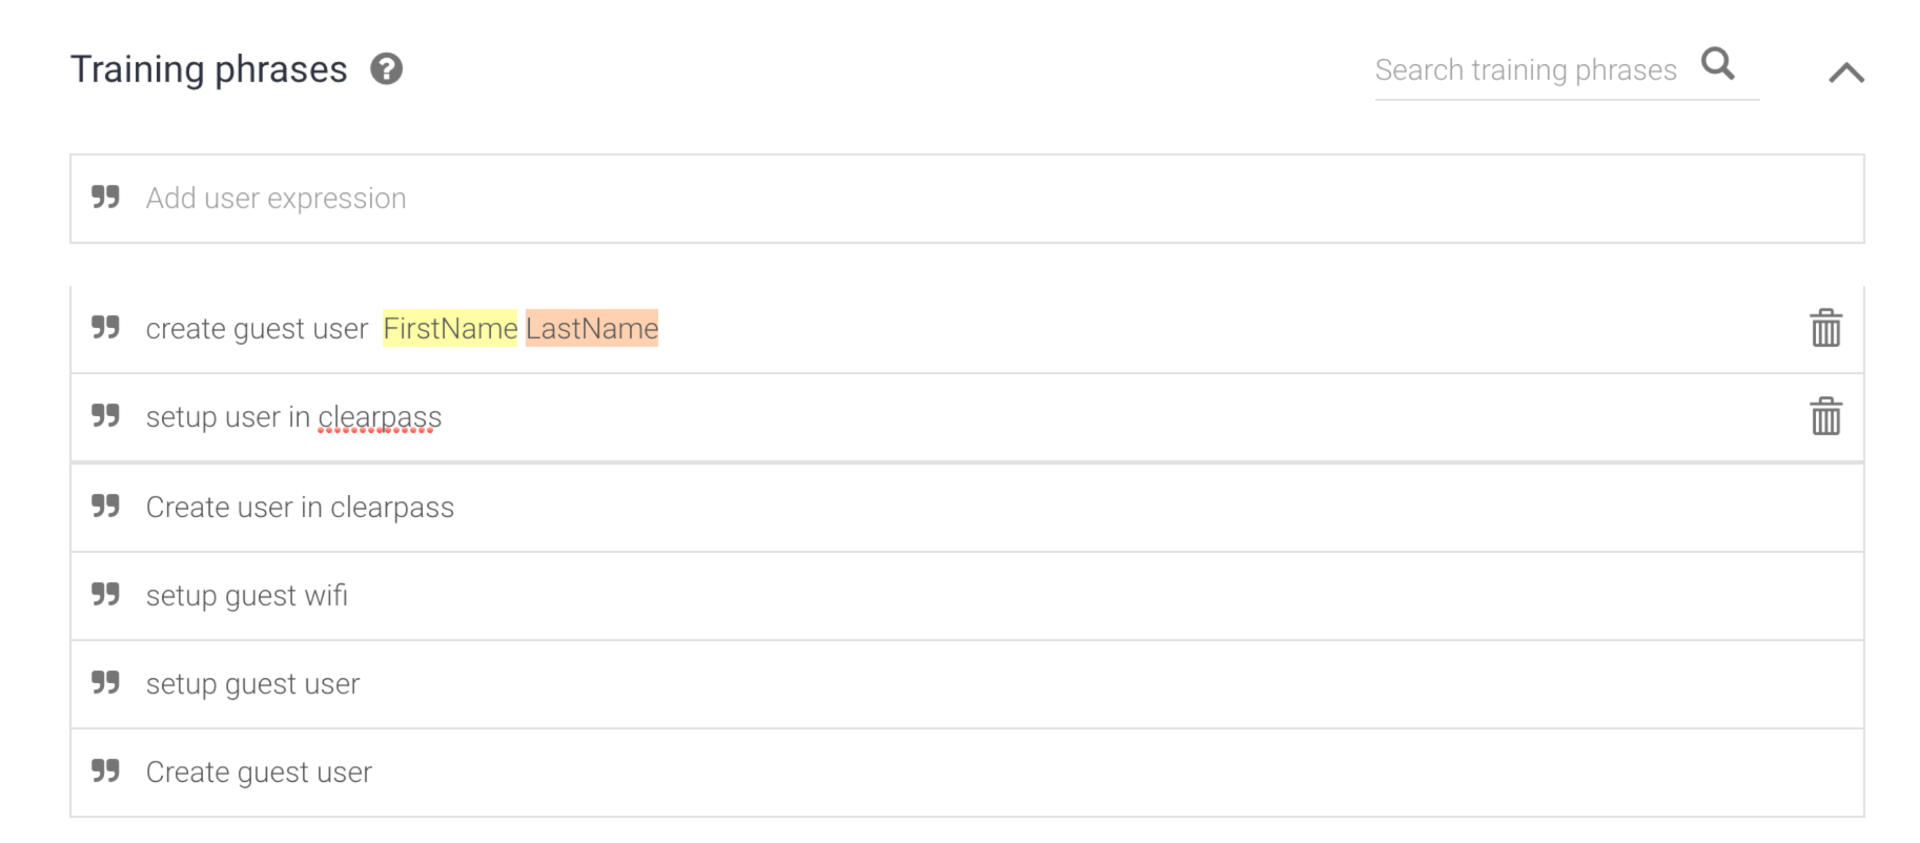
Let's deal identifying that a user wants to create a guest. These training phrases will help DialogFlow determine what I'm want to be done for the "intent" of creating a guest ClearPass user.
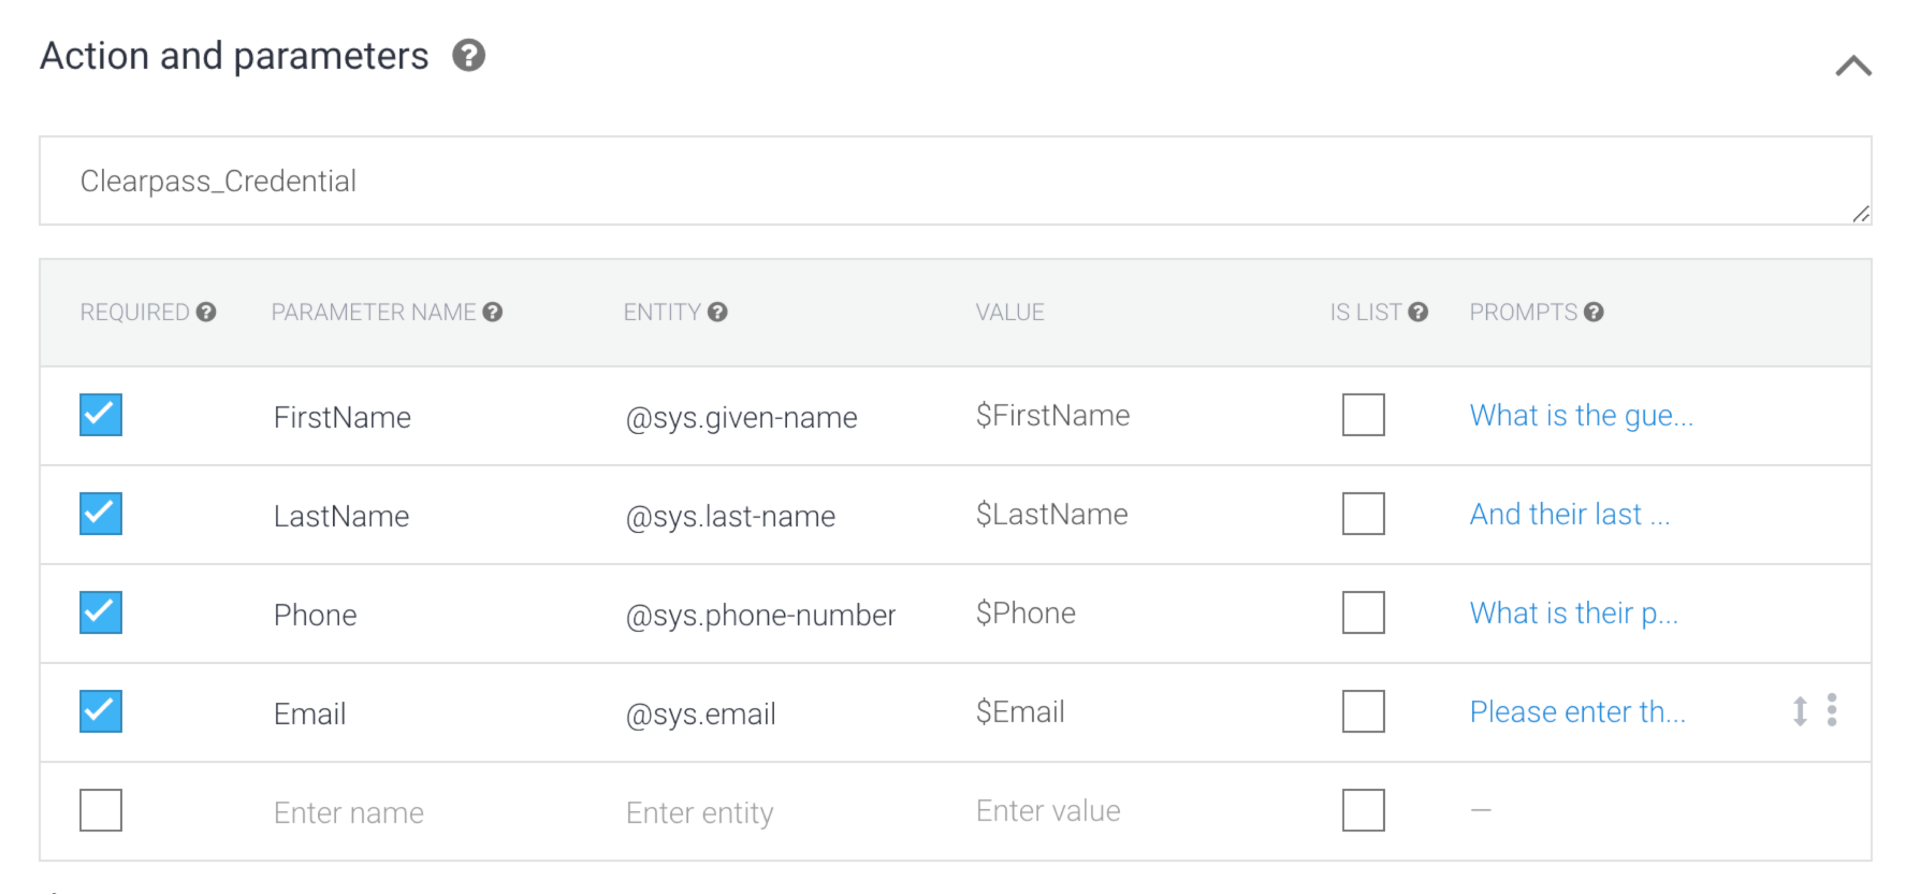
Now that identified what needs to be done; I need to know what data we are going to send towards ClearPass. I suspect that "enabled" will always be true when we are creating it. Really, I need their First/Last names, email, and phone number.
Let's define these parameters, and put in some options to prompt the user for that information.
 Now that we have these pieces, Let's plumb this into Slack. Fortunately, DialogFlow has a built-in integration to Slack.
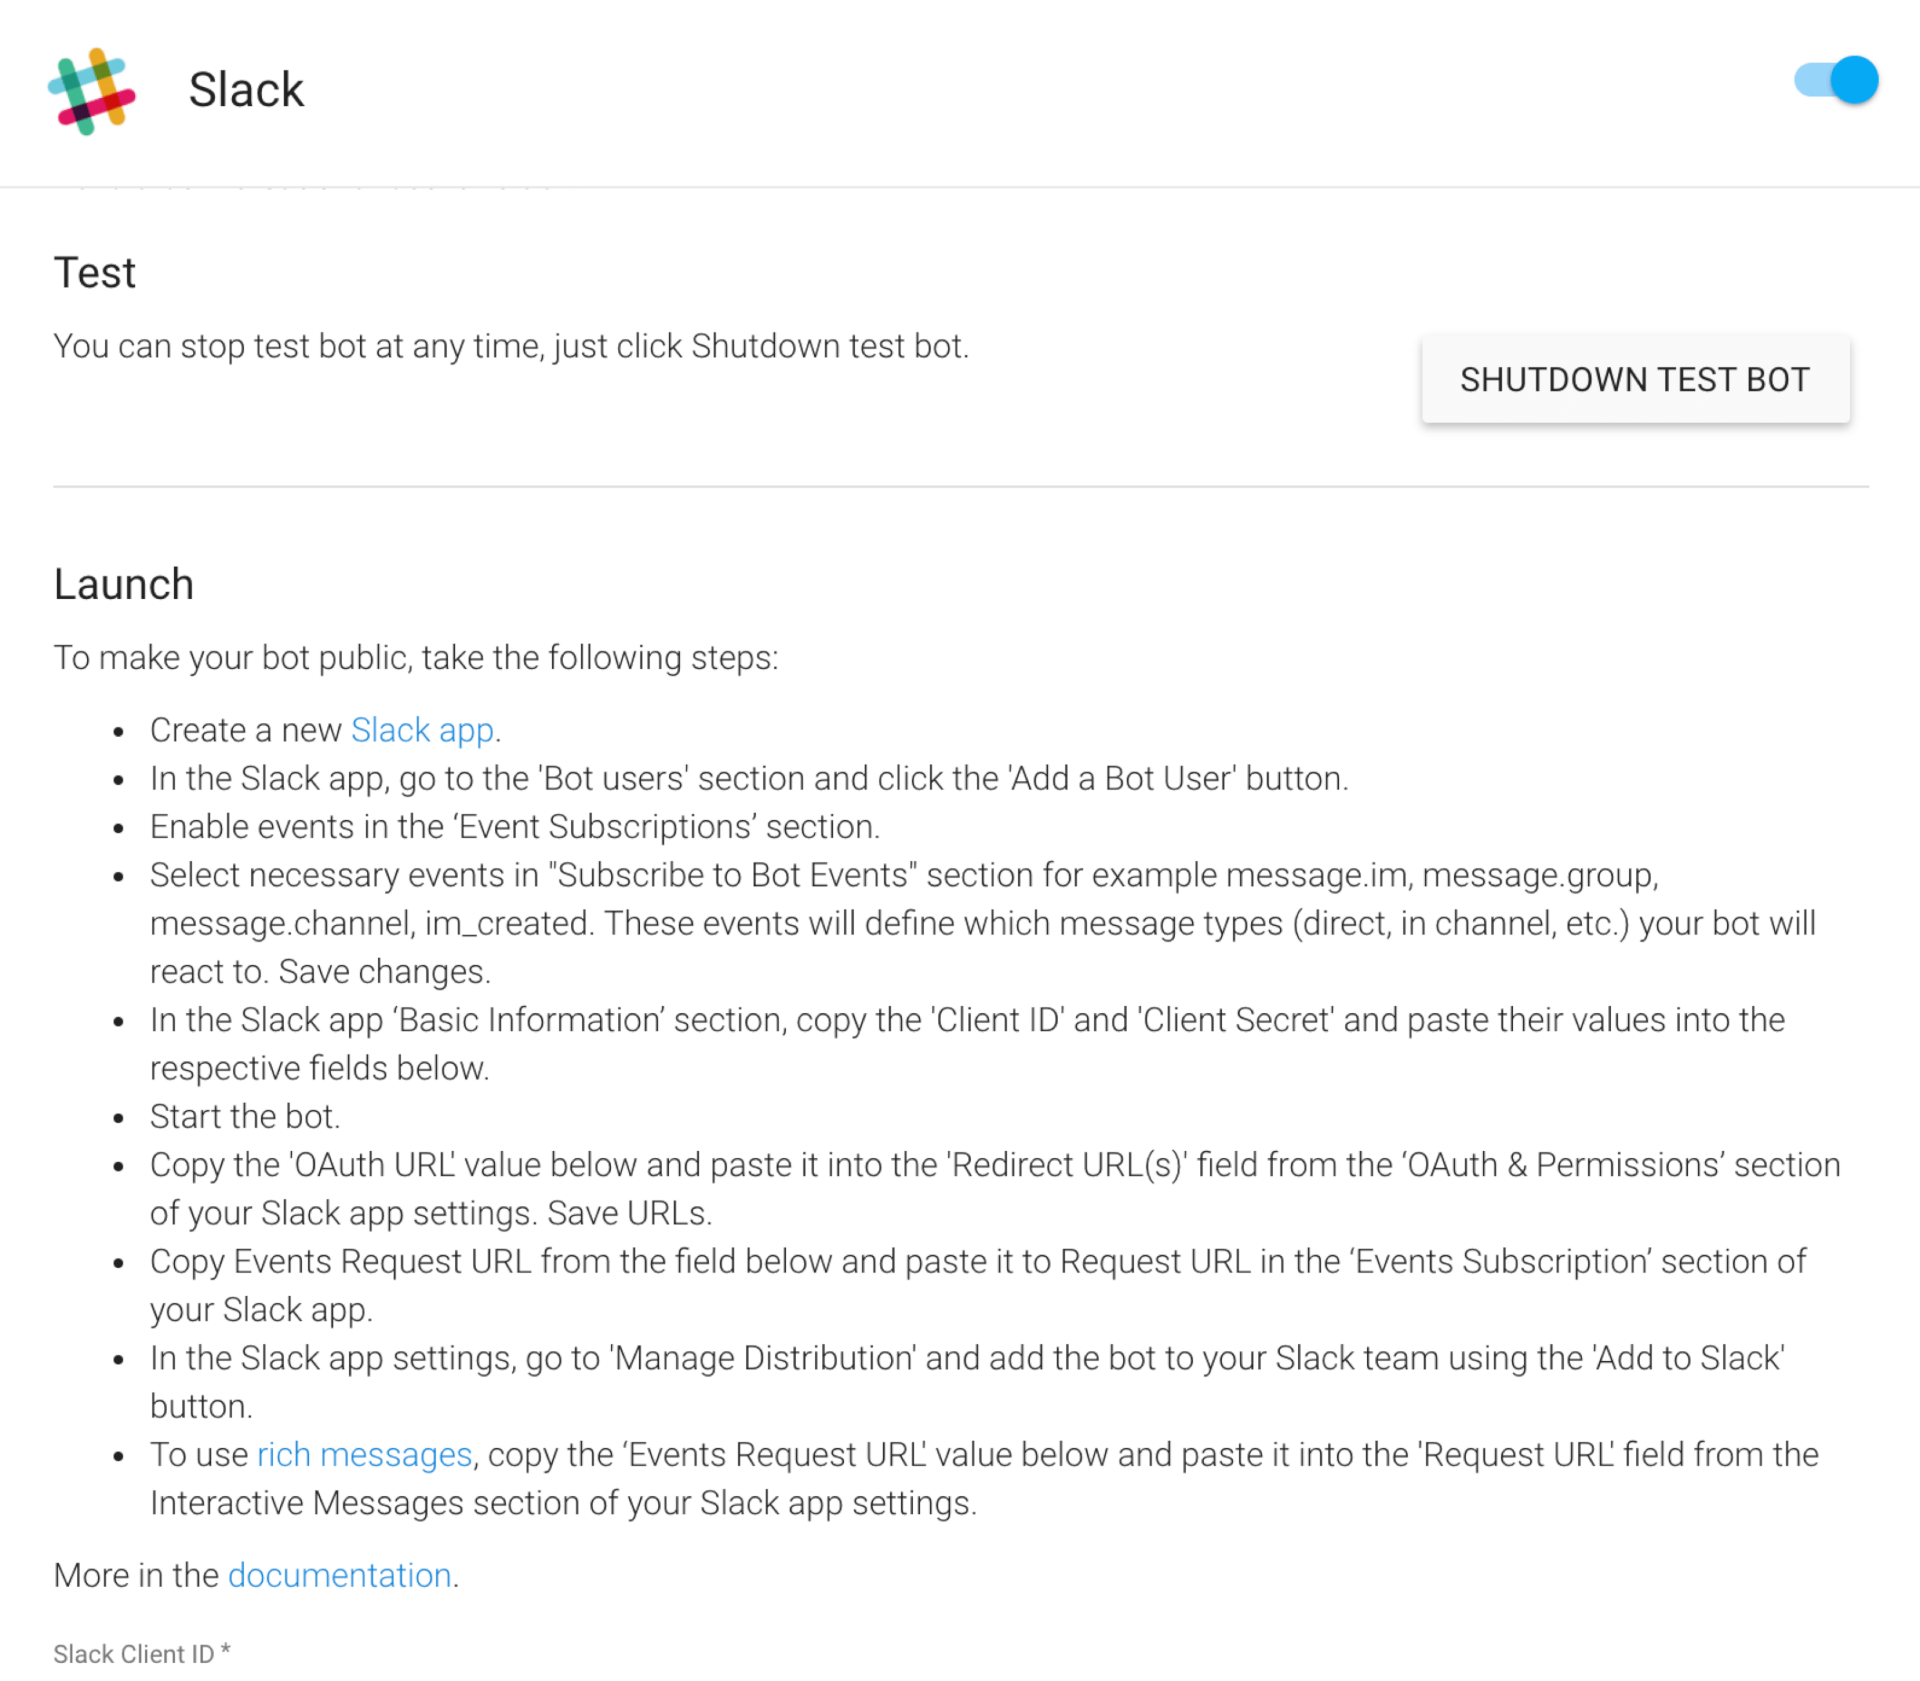
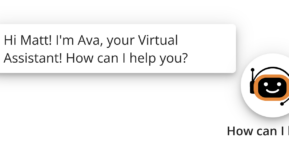
Now let's test the bot to see if it prompts for the right values:
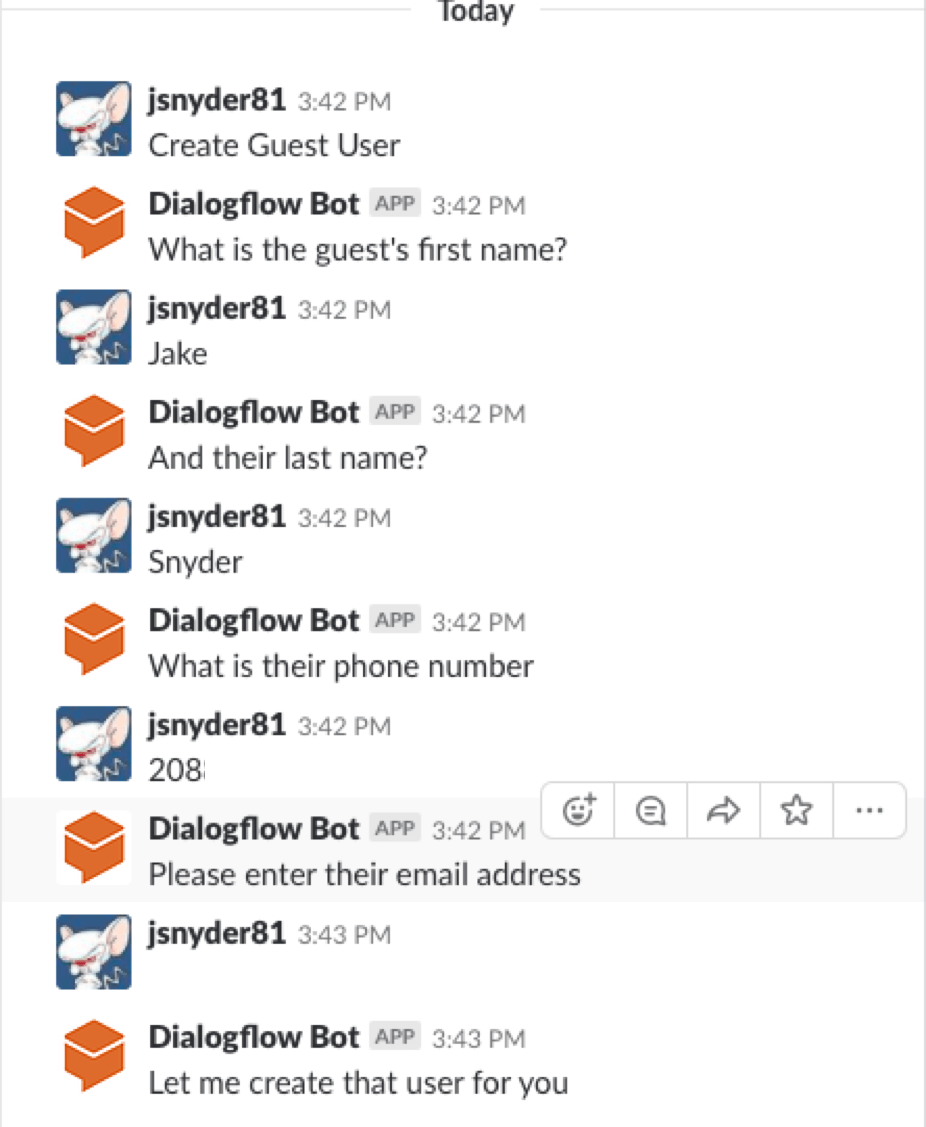
Sweet, my bot knows how to talk to me. Now I need to pass this info to my ClearPass Server.
Now the issue of how to get the DialogFlow engine to talk to my ClearPass server. The easy way to do this is making my ClearPass box accessible to the internet. Most security folks just died a little after reading that. So how do we do this in a way that isn't a security issue? The other option is to create a web application to receive the post and make that publicly acceptable. The challenge there is my home lab doesn't have any public address space.
Step 3: Connecting the Cloud to On-Premises services.
Ngrok is a cloud tunneling service used to do exactly what we are trying to accomplish. It allows us to make an outbound tunnel from our Linux box to URL in the cloud.
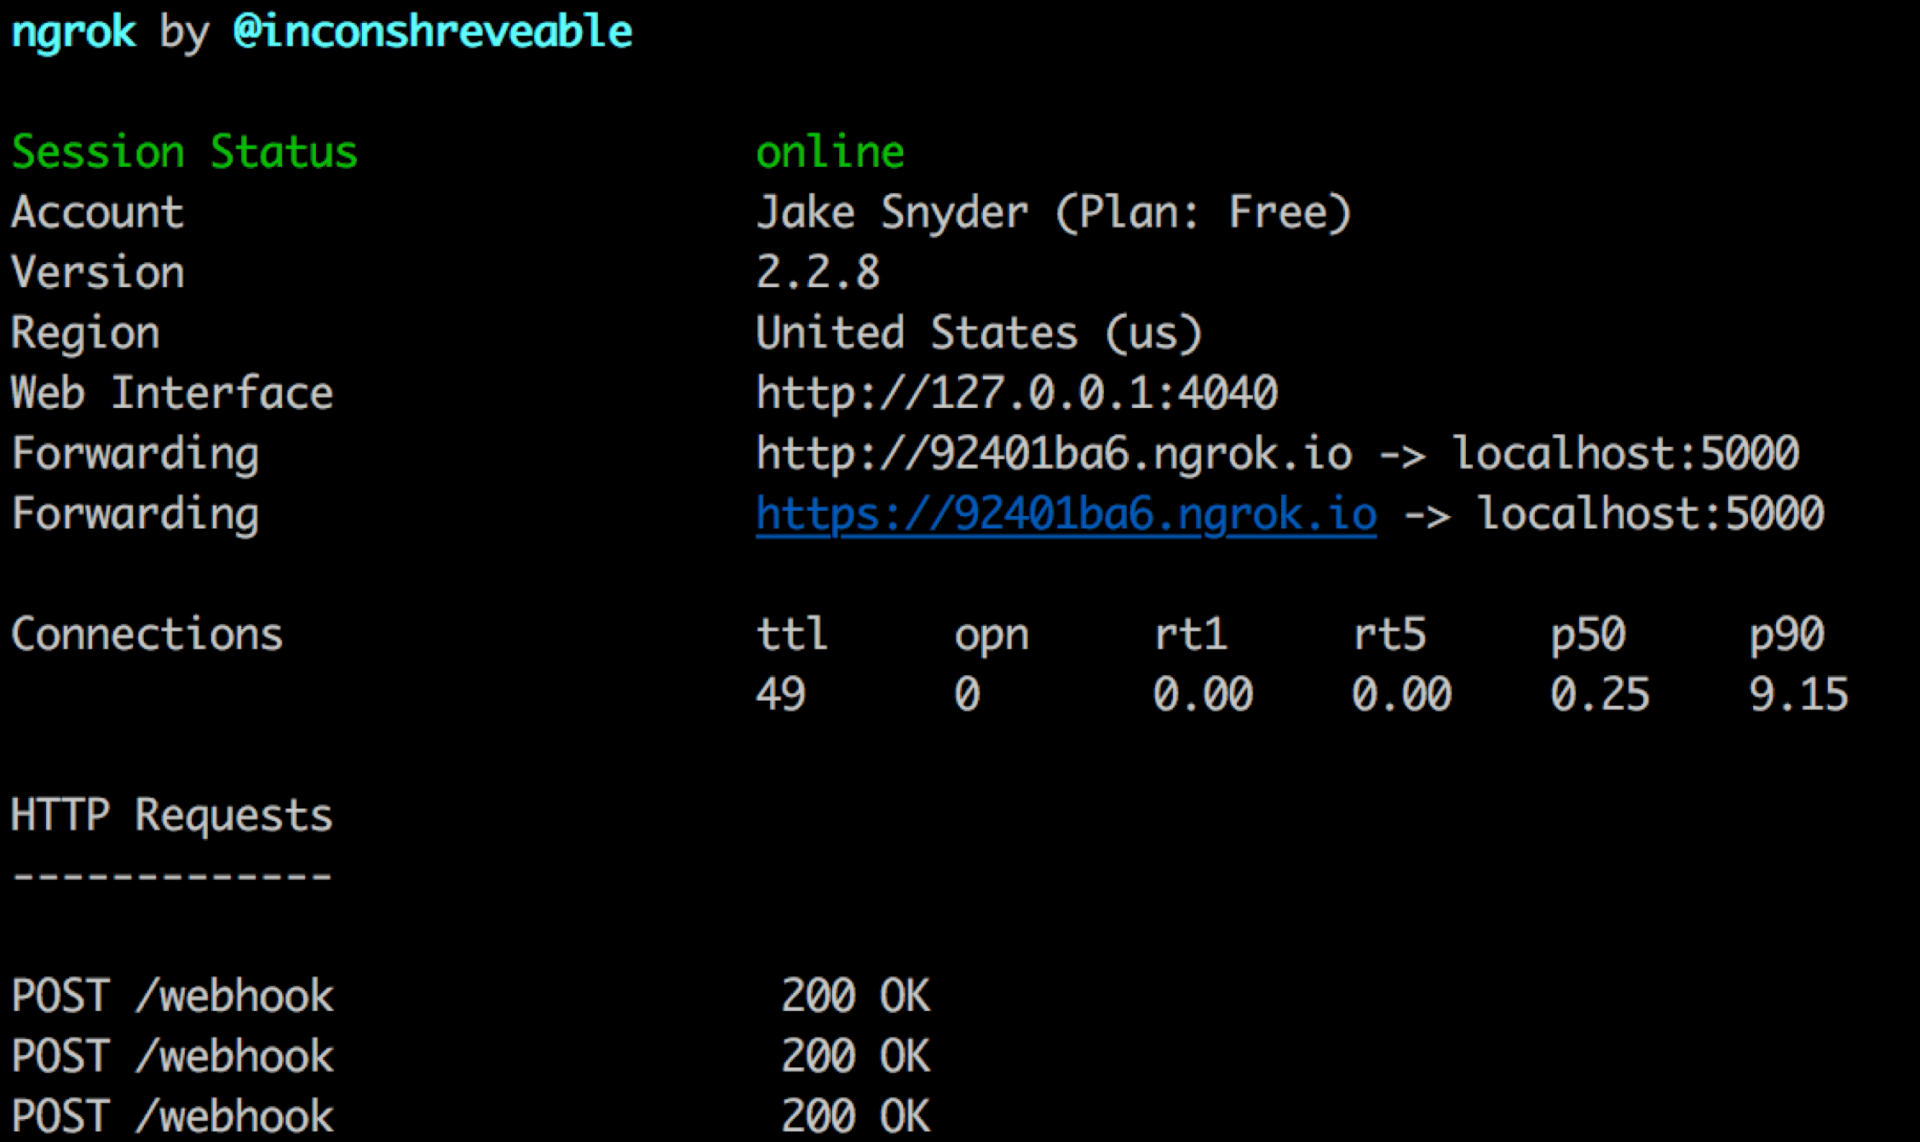
With the free account, you can start ngrok and get a URL you can point Dialog flow. This essentially builds a tunnel from the public URL to our machine running python on the Lan. I'll have to change this every time I launch
This is the output from ngrok on my Mac, mapping port 5000
Now we have a tunnel into our python box; we need to build a service that can receive the webhook push from DialogFlow.
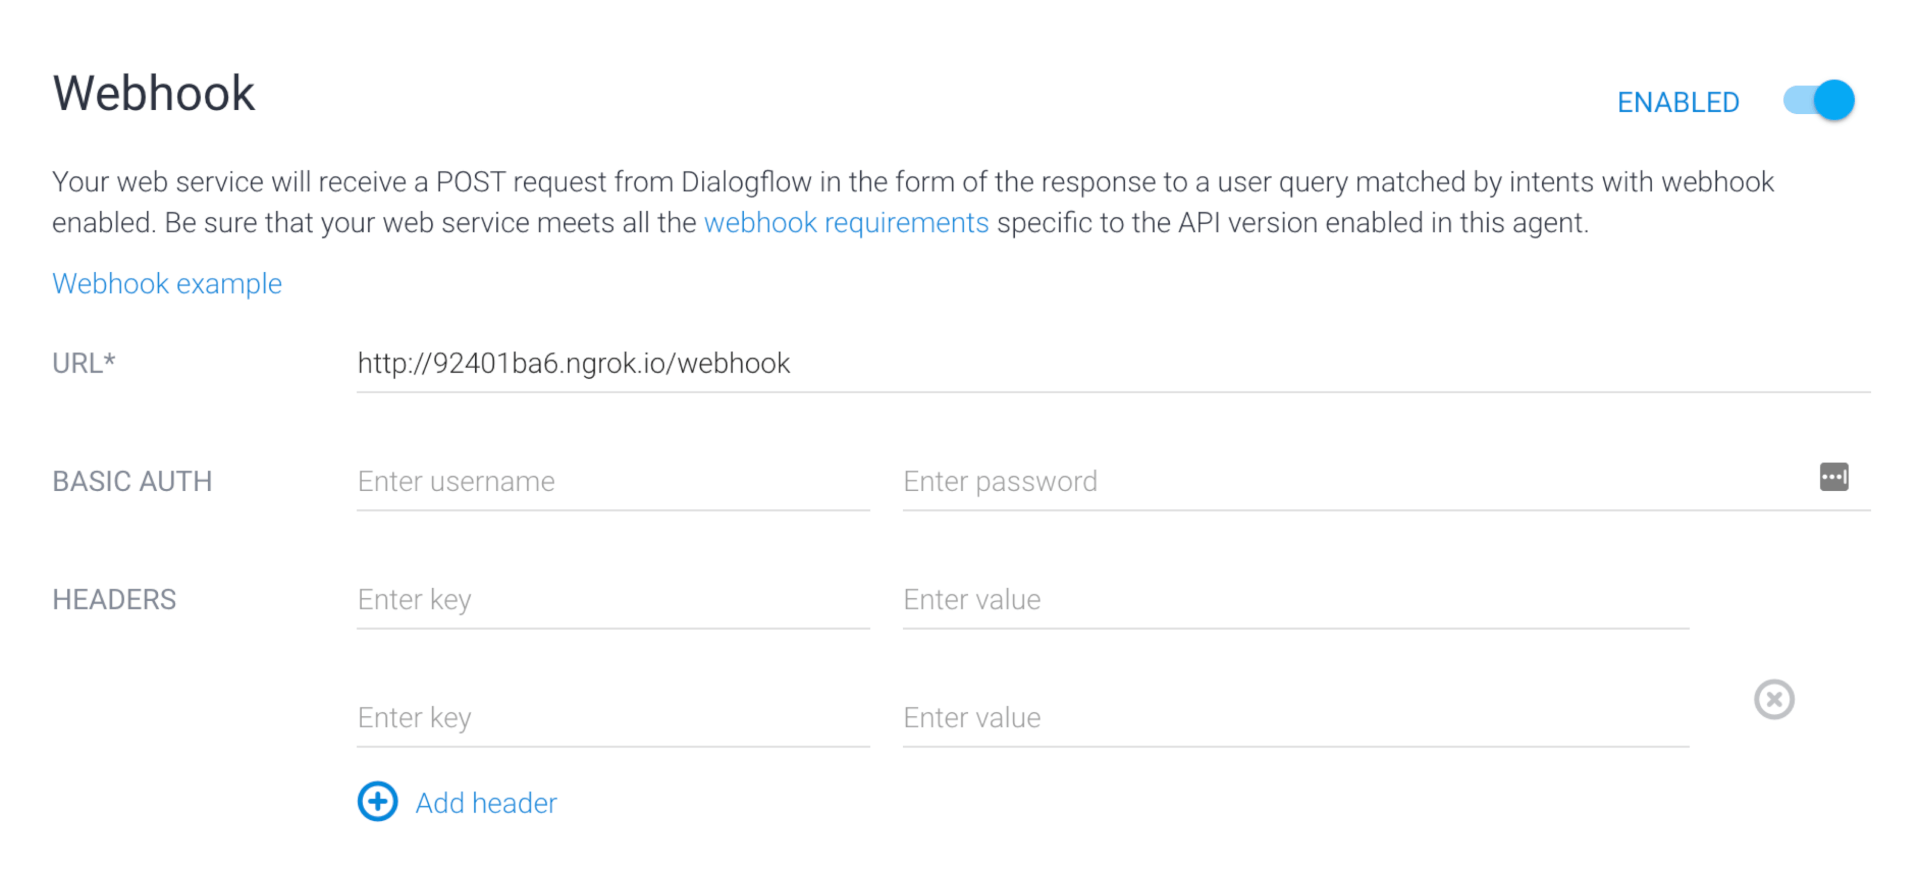
For this, I'm going to build a simple web site with python using the Flask library. This will essentially take a post from DialogFlow with the info it collects and make the call to ClearPass.
I started with some sample code here: https://bitbucket.org/atlassianlabs/webhook-listener/src
This is a simple listener for a web hook. I've modified it to process the http POST from Dialog flow.
For the /webhook route, here is the following logic:
@app.route("/webhook", methods=["GET", "POST"])
def tracking():
"""Endpoint for receiving webhook from bitbucket."""
if request.method == "POST":
data = request.get_json()
#Parse the data coming from DialogFlow
processed_data = parse_Chatbot(data)
#Using the processed data, create a ClearPass User
results = create_ClearPassUser(processed_data, ClearPass_auth_token)
print(results)
print(str(results.text))
print "Webhook received!"
my_response = {}
my_response['displayText'] = "User has been created, they should receive an SMS with their login"
return json.dumps(my_response)
This calls the parse_Chatbot function and passes in the data sent from DialogFlow. This prepares the JSON request to send to ClearPass.
def parse_Chatbot(my_data):
#Create a dictionary to put all the of the values into
process_data = {}
#Create a username from the first and last names and append a unique number to the end
process_data['username'] = my_data['result']['parameters']['FirstName'] + my_data['result']['parameters']['LastName'] + str(randint(1000, 9999))
process_data['email'] = my_data['result']['parameters']['Email']
process_data['visitor_phone'] = my_data['result']['parameters']['Phone']
process_data['enabled'] = True
process_data['role_id'] = "2"
process_data["auto_send_sms"] = "1"
process_data['password'] = str(randint(1000,9999))
print(json.dumps(process_data))
return process_data
Here we set the username, password, phone number, role, and a few other specifics directly out of the ClearPass API documentation. For username I'm combining their First and Last names, along with a 4-digit number. The password is simply a 4 digit pin.
Note: Some of these values don't appear in the documentation, but I found elsewhere on the airheads community.
Now I also define the functions that make the call to ClearPass to create the user with the data I return. The aruba_Post is a generic function to post data to the ClearPass server. The create_ClearPassUser function calls this to post the data specific to the /guest API.
def aruba_Post(url_extention, payload, my_auth_token):
requests.packages.urllib3.disable_warnings()
my_session = requests.Session()
my_req_url = "https://" + ClearPass_fqdn + url_extention
print(my_req_url)
print(payload)
headers = {'Authorization': my_auth_token, 'Cache-Control': "no-cache", 'Content-Type': "application/json"}
response = my_session.post(my_req_url, headers=headers, data=payload, verify=False)
return response
def create_ClearPassUser(my_data, my_auth_token):
requests.packages.urllib3.disable_warnings()
headers = {'Authorization': my_auth_token, 'Cache-Control': "no-cache"}
response = aruba_Post("/api/guest", json.dumps(my_data), ClearPass_auth_token)
print(str(response.status_code))
print(str(response.text))
return response
Now, to bring it all together. Let's repeat talking to the slack bot, but this time, we'll be running the flask app with NGROK running.
We can check out the NGROK status page, and see that it is sending us the info:
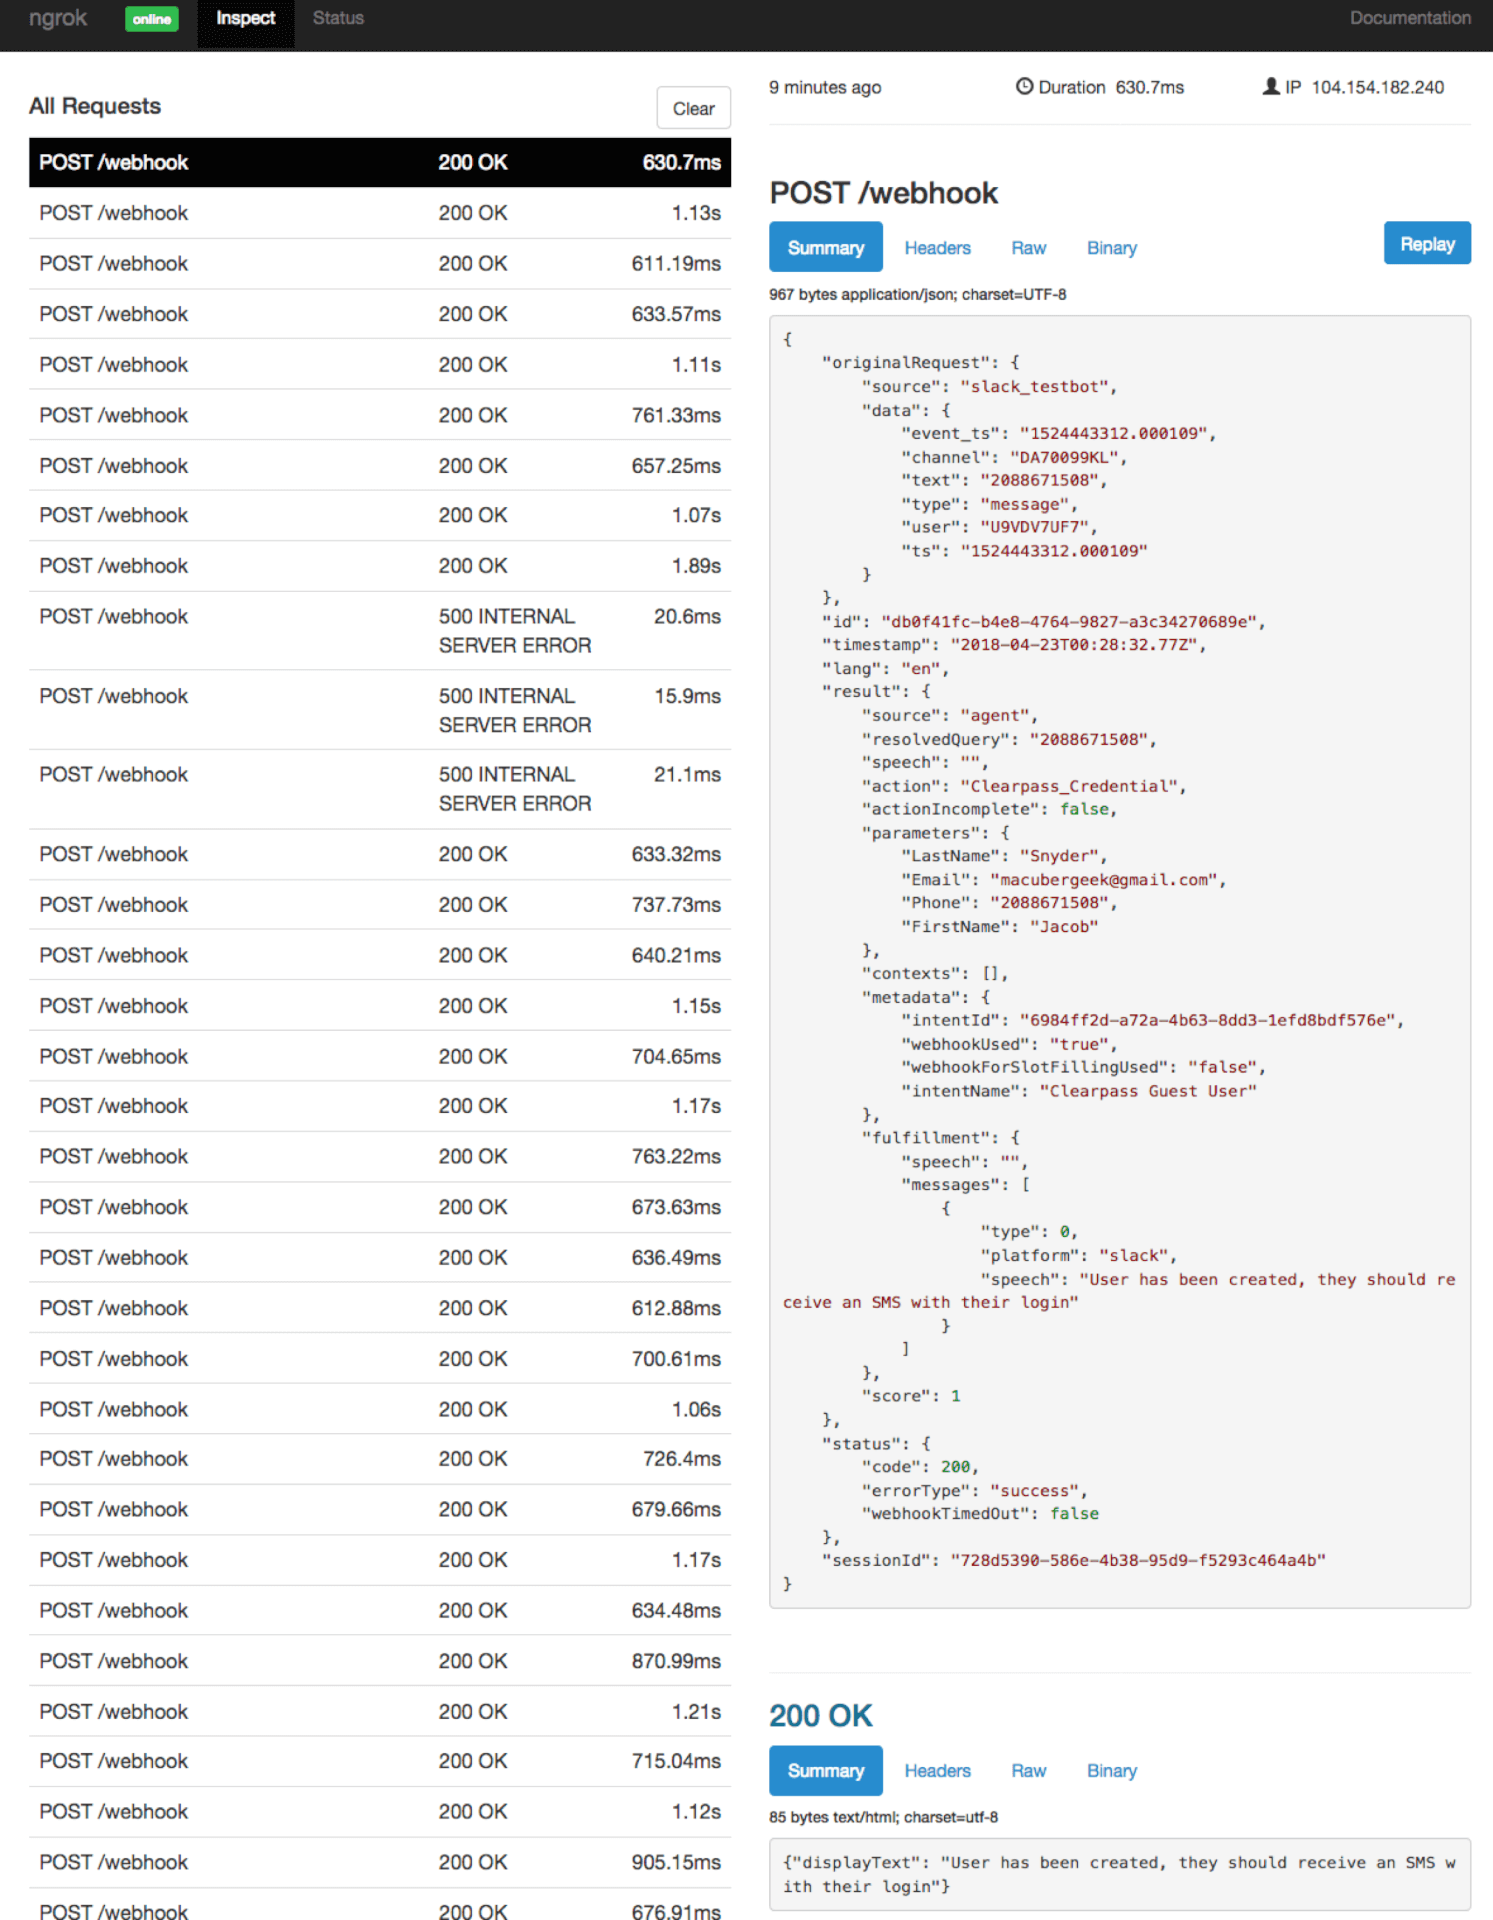
So far we've recreated the basic demo from the technology keynote. We could continue down this path to add additional functionality, check if the user exists, perform password resets, etc.
And there you have it. One thing to keep in mind that my goals are not necessarily the goals Aruba used to create their chatbot. My goal was to create a simple chatbot that users in the community could do without a lot of programming.